Back to Documents
Add a Document - Step 1
Add a new Document to Toolbox
Tags:
Use the Documents module to manage your procedures, policies, work instructions, forms, templates - anything you need to control. Toolbox has a simple approval workflow and manages versions.
There are a couple of ways to store your documents.
You can upload a file - Word, Excel, Visio, PDF, a CAD file - any format is OK. If you already have documentation, there's no need to change it - just upload into Toolbox. The file will be stored as-is. Toolbox doesn't modify the file in any way. This method gives you complete control over the presentation and formatting of your information. However, to view the content your end users will have to download the file and open it with a suitable application.
You also have the option of building your document directly in Toolbox. Add any number of sections containing text, images, or drawings/flowcharts. End users can view the content online without having to download a file, so it's better for mobile devices. However, you have less control over the presentation.
Add a new Document
Watch on YouTube
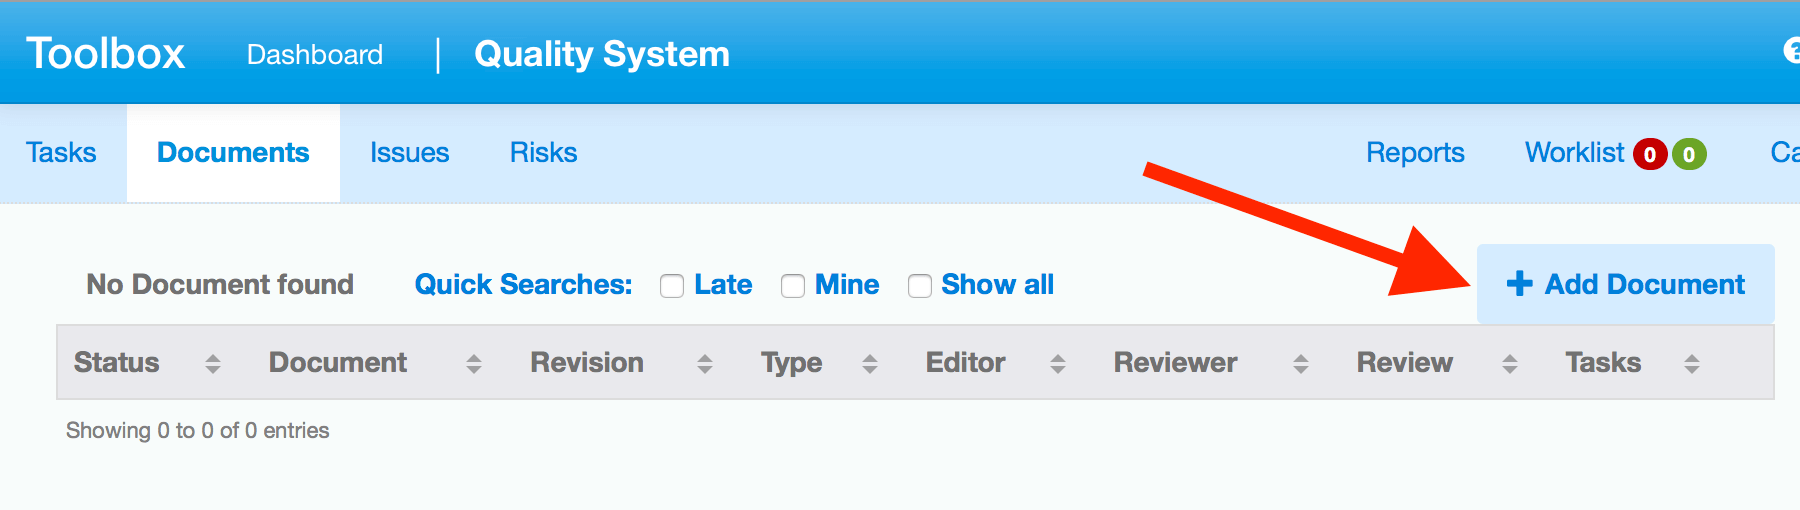
Go to the Documents module (in the light blue toolbar) and click on + Add Document over to the right:
Describe the Document
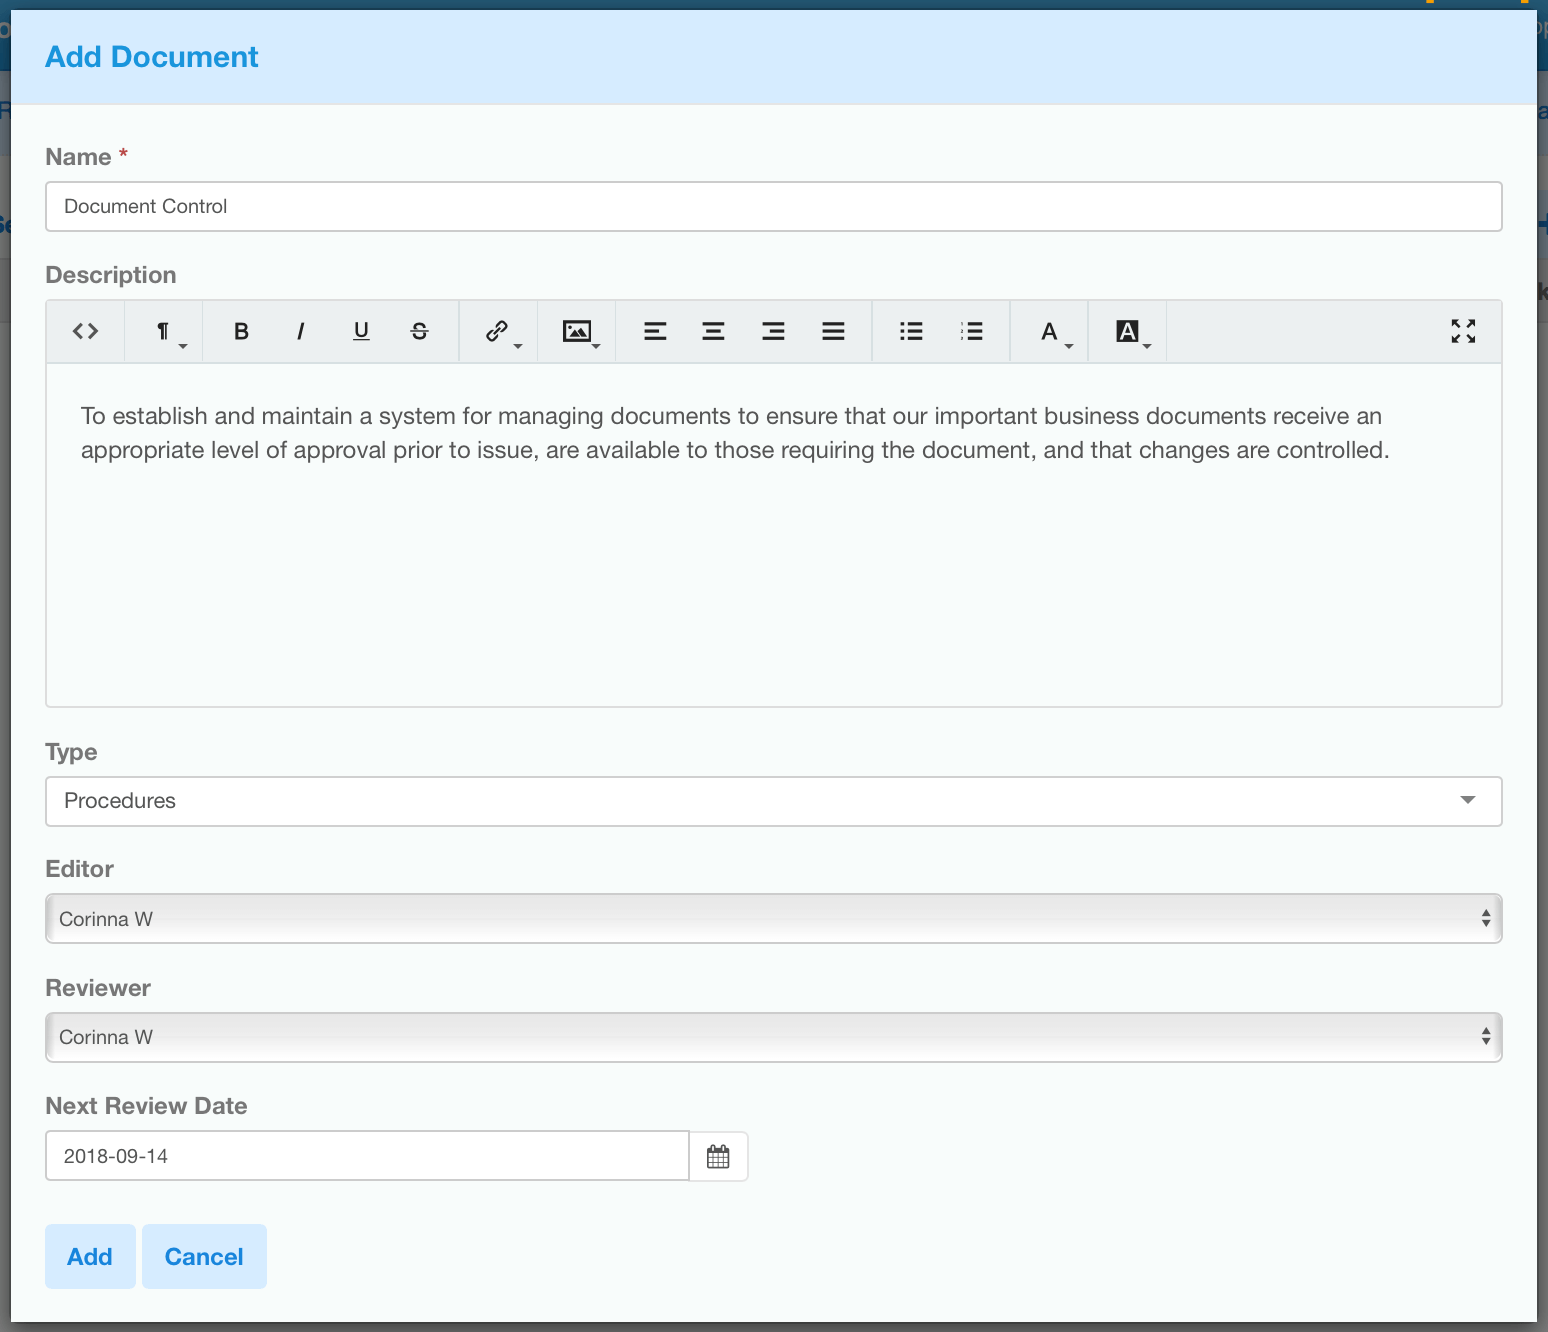
Clicking on "Add Document" will open up an initial form to describe and categorize the Document:
The fields on this form collect information about the document. You will add the actual content of the controlled document in the next screen.
"Add Document" fields:
- Name: (REQUIRED) the title of this document. Incorporate any other document identification - e.g. document numbers. Your list of documents will be sorted on this field by default.
- Description: a brief summary of the document contents, or purpose/scope.
- Type: Use this to organise your documents into categories. The list can be edited by a Manager user under 'Settings'.
- Editor: This person can edit the document. Default value is the creator. (Other project members won’t be able to edit the draft or view the document until it has been released).
- Reviewer: the person who will approve the document for release.
- Next Review Date: Schedule when this document should be reviewed again. It will appear in the worklist for the editor and reviewer as a ‘due date’.
Apart from ‘Name’, all the fields are optional.
Click on “Add” at the bottom, to save and create the document.
Next step is to add content to the draft of the document.